When finishing wood, achieving that perfect shine can feel like a daunting task. One question that often pops up is, do you have to sand between coats of polyurethane? The answer is a resounding yes if you want a smooth, professional finish. Sanding between coats helps the layers stick together, removes imperfections, and ensures that your final surface looks great. Let’s break down why this step is so important and how to do it right.
Key Takeaways
- Sanding between coats improves adhesion and prevents peeling.
- Use fine-grit sandpaper, like 320-grit, for the best results.
- Always clean the surface after sanding to remove dust and debris.
- Apply multiple thin coats for a smoother finish, rather than one thick layer.
- Different wood types may require specific techniques for best results.
Understanding Polyurethane Finishes
Types of Polyurethane
Okay, so polyurethane isn’t just one thing. There are a couple of different kinds, and it’s good to know the difference. You’ve got oil-based and water-based. Oil-based polyurethane is the old-school stuff. It’s known for being super durable and giving a warm, amber-ish tint to your wood. The downside? It takes forever to dry and smells strong. Water-based polyurethane, on the other hand, dries way faster, doesn’t stink as much, and stays clear, which is great if you don’t want to change the color of your wood. Choosing between oil-based and water-based polyurethane depends on what you’re going for.

Types of Polyurethane
Benefits of Using Polyurethane
Why even bother with polyurethane? Well, it’s all about protection and looks.
- First off, it’s tough. Polyurethane creates a hard layer that protects your wood from scratches, dents, and spills.
- It also makes your wood easier to clean. No more worrying about water rings from your coffee cup!
- Plus, it can really bring out the natural beauty of the wood, giving it a nice sheen and depth.
I used polyurethane on my kitchen table a few years back, and it’s still going strong. Seriously, that stuff is like a shield against my kids.
Common Applications for Polyurethane
Polyurethane is pretty versatile. You see it used all over the place. The obvious one is hardwood floors. It’s what keeps them looking good despite all the foot traffic. But it’s also used on furniture, cabinets, doors, and even some musical instruments. If you want to protect a wood surface and make it look nicer, polyurethane is a solid choice. It’s a great way to achieve a durable and rich finish.
Importance of Sanding Between Coats
Okay, so you’ve applied your first coat of polyurethane. It looks…okay. Maybe a little rough? Don’t panic! This is where sanding between coats comes in. It’s not just an extra step to annoy you; it’s what separates a decent finish from a flawless one. Trust me, the extra effort is worth it.
Enhancing Adhesion
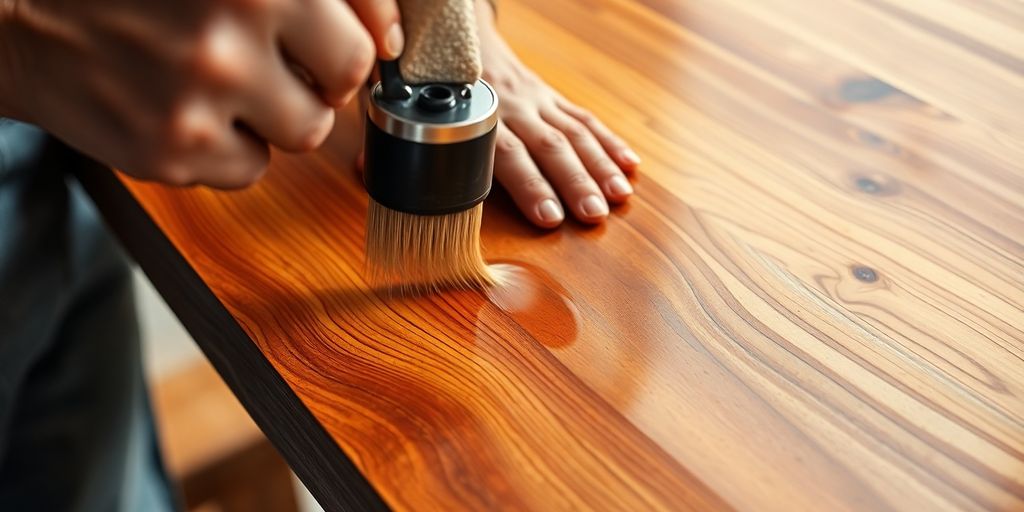
Think of polyurethane like paint – it needs something to grip onto. The first coat often dries smooth, which isn’t ideal for the next coat to stick properly. Sanding creates tiny scratches, giving the new layer something to grab onto. This is especially important for multiple coats; without it, you risk peeling or chipping down the line. It’s like preparing a surface before painting – you wouldn’t skip that, would you?
Removing Imperfections
No matter how careful you are, dust happens. Little nibs, bubbles, or even stray brush hairs can get trapped in the finish. Sanding knocks down these imperfections, creating a smooth, even surface for the next coat. It’s your chance to fix any mistakes and get things looking perfect. I usually find a few spots that need attention after the first coat. Using fine grits is key here; you don’t want to create more problems than you solve!
Achieving a Smooth Finish
Ultimately, sanding between coats is about building up a smooth, glass-like finish. Each coat fills in the microscopic scratches from the previous sanding, creating a progressively smoother surface. It’s a cumulative effect – the more you sand (correctly!), the better the final result. Think of it like polishing a car; you wouldn’t expect a perfect shine after just one pass, right?
Skipping sanding between coats is like taking shortcuts on a recipe. You might end up with something edible, but it won’t be as good as it could be. The extra effort pays off in a professional-looking, durable finish that you’ll be proud of.
Choosing the Right Sandpaper
Choosing the correct sandpaper is super important for getting that smooth, professional-looking polyurethane finish. It’s not just about grabbing any old sandpaper; you need to think about the grit, the type, and how it all works together. Let’s break it down.
Grit Selection for Different Coats
The grit of your sandpaper is basically how coarse or fine it is. For sanding between coats of polyurethane, you’ll generally want to use finer grits than you would for sanding bare wood. Think of it like this: you’re not trying to remove a ton of material, just smooth out any imperfections or dust nibs.
- First Coat: After the first coat, you might start with something around 320-grit. This will help knock down any raised grain or imperfections without being too aggressive.
- Subsequent Coats: For the following coats, move up to 400-grit or even 600-grit. The goal is to gently smooth the surface and prepare it for the next layer of polyurethane. Some people even go up to 800-grit or higher for the final coat to achieve an ultra-smooth finish.
- Final Coat: After the third coat, sand with 320-grit sandpaper, then 400, and finally 600-grit sandpaper. Sand in alternating directions with each abrasive to make it easier to see whether you’ve removed the scratches from the previous grit. Sand with the grain on the final pass. Then, wipe off the dust with a rag dipped in mineral spirits.
Best Practices for Sanding
Okay, so you’ve got your sandpaper. Now what? Here are a few tips to keep in mind:
- Use a Sanding Block: Wrapping your sandpaper around a sanding block will help you maintain a flat, even surface. This is especially important on larger areas.
- Light Pressure: Don’t press down too hard! Let the sandpaper do the work. Applying too much pressure can create unevenness and scratches.
- Sand with the Grain: Whenever possible, sand in the direction of the wood grain. This will help minimize the appearance of scratches.
- Clean the Surface: After sanding, always wipe down the surface with a tack cloth or a slightly damp cloth to remove any sanding dust. This will ensure that the next coat of polyurethane adheres properly.
Avoiding Common Mistakes
Sanding seems simple, but it’s easy to make mistakes that can ruin your finish. Here are a few things to watch out for:
- Skipping Grits: Don’t jump from a coarse grit to a very fine grit. This will leave scratches that the finer grit won’t be able to remove.
- Using Dull Sandpaper: If your sandpaper is clogged or worn out, it won’t cut effectively. Replace it regularly to ensure a smooth, even finish.
- Sanding Too Much: Be careful not to sand through the polyurethane layer, especially on edges and corners. This can expose the wood and create an uneven finish.
Sanding between coats of polyurethane is all about patience and attention to detail. Take your time, use the right sandpaper, and follow these tips, and you’ll be well on your way to achieving a flawless finish. Remember, the goal is to create a smooth, even surface for the next coat to adhere to, not to remove large amounts of material.
Techniques for Applying Polyurethane
Brush vs. Spray Application
Okay, so you’ve got your polyurethane, and now you’re wondering how to actually get it on your project. There are two main ways: brushing and spraying. Brushing is pretty straightforward – you dip a brush in the finish and apply it to the wood. It’s good for smaller projects or when you want more control. Spraying, on the other hand, uses a sprayer to apply a fine mist of polyurethane. This is often better for larger surfaces because it can give you a more even finish and can be faster. However, it requires more setup and cleanup, plus you need to make sure you have proper ventilation. I’ve used both, and honestly, it depends on the project. For small stuff, I grab a brush. For bigger jobs, I break out the sprayer. Just remember to thin the polyurethane a bit with mineral spirits for oil-based, or water for water-based, to help it flow smoothly and reduce brush marks. Always test your application method on a scrap piece first!
Applying Thin Coats
This is a big one: thin coats are your friend. Seriously. Applying thick coats might seem like it’ll save you time, but it almost always leads to problems. Thick coats are more likely to drip, sag, and take forever to dry. Plus, they can trap bubbles. Thin coats, on the other hand, dry faster, are less likely to have imperfections, and build up to a smoother, more durable finish. It might take more time overall because you need to apply more coats, but the end result is worth it. I usually aim for three thin coats, sanding lightly between each one with 220-grit sandpaper. Trust me, patience pays off here.
Timing Between Coats
So, you’ve applied a coat of polyurethane, and now you’re staring at it, wondering when you can apply the next one. The timing between coats is important. You need to let each coat dry completely before applying the next one. Check the manufacturer’s instructions on the can for specific drying times, as they can vary depending on the type of polyurethane and the environmental conditions. Humidity and temperature can affect drying time, so keep that in mind. A good rule of thumb is to wait at least 24 hours between coats. Before applying the next coat, lightly sand the surface with fine-grit sandpaper to enhance adhesion and remove any imperfections. Also, make sure to clean the surface thoroughly after sanding to remove all dust and debris. This will help ensure a smooth, flawless finish.
Proper preparation is key to achieving a flawless polyurethane finish. Taking the time to apply thin coats, allowing sufficient drying time, and sanding lightly between coats will ensure a long-lasting and beautiful result.
Final Steps for a Flawless Finish
Curing Time Considerations
Okay, so you’ve applied your last coat of polyurethane. Now comes the hardest part: waiting. Polyurethane needs time to fully cure, not just dry. Drying is when the solvents evaporate, but curing is when the finish hardens and reaches its maximum durability. Rushing this process can lead to a soft, easily damaged finish. Generally, give it at least 24 hours, but check the manufacturer’s instructions – some products need longer. Temperature and humidity also play a role; cooler, more humid conditions will extend the curing time. I usually try to wait at least 72 hours before putting anything on the finished surface, just to be safe.
Cleaning Up After Application
Cleanup is never fun, but it’s a necessary evil. For oil-based polyurethane, you’ll need mineral spirits or paint thinner to clean your brushes and equipment. Latex or water-based polyurethane can be cleaned with soap and water. Don’t just rinse your brushes in the sink; that’ll clog your drains. Wipe off as much excess polyurethane as possible before cleaning. Dispose of used rags properly, as they can be a fire hazard. I like to let my brushes soak in the cleaner for a while, then rinse them thoroughly and let them air dry. A clean work area is key to a good finish, so don’t skip this step!

Cleaning Up After Application
Maintaining Your Finish
Once your polyurethane finish is cured, you’ll want to keep it looking its best. Regular dusting with a soft cloth is a good start. Avoid using harsh chemicals or abrasive cleaners, as they can damage the finish. For deeper cleaning, a mild soap and water solution will usually do the trick. Consider applying a coat of furniture polish or wax periodically to add extra protection and shine. Also, be mindful of what you place on the finished surface; coasters under drinks and pads under hot dishes can prevent scratches and water rings. With a little care, your polyurethane finish will last for years.
After the final coat, I vacuum the work area again and let the dust settle overnight. In the winter, I warm the room and then turn off the overhead furnace a couple of hours before finishing to settle any dust.
Troubleshooting Common Issues
Dealing with Bubbles and Streaks
Okay, so you’ve got bubbles or streaks in your polyurethane finish? Don’t panic! It happens. Bubbles usually pop up when you shake the can too vigorously or apply the finish too thickly. Streaks, on the other hand, often come from using a dirty brush or not overlapping your strokes enough.
- Let the bubbles pop on their own; don’t try to burst them. Sometimes, they’ll settle as the finish dries.
- For streaks, lightly sand the area with fine-grit sandpaper (like 320-grit) after the finish is completely dry. Then, apply another thin coat, making sure to overlap your strokes.
- Consider using a foam brush for smoother application, especially on smaller projects.
A good tip is to thin your polyurethane slightly with mineral spirits. This helps it flow better and reduces the chance of bubbles and streaks. Just be sure to follow the manufacturer’s instructions for thinning ratios.
Fixing Uneven Coats
Uneven coats are a pain, but they’re fixable. Usually, it’s because you didn’t apply enough finish in some areas or you let it pool in others. The key is to catch it early. If you notice it while the finish is still wet, try to even it out with your brush. If it’s already dry, you’ll need to do some sanding.
- Sand the entire surface with a medium-grit sandpaper (like 220-grit) to level out the high spots.
- Wipe away the sanding dust with a tack cloth.
- Apply a fresh coat of polyurethane, focusing on even coverage.
Addressing Adhesion Problems
Adhesion problems are the worst. This is when the polyurethane doesn’t stick properly to the wood, and it can peel or flake off. This often happens if the surface wasn’t prepped well enough, or if there’s contamination on the wood. Proper surface preparation is key to avoiding this issue.
Here’s a quick checklist:
- Make sure the wood is clean and free of dust, grease, and wax.
- Sand the wood before applying the first coat of polyurethane.
- If you’re applying polyurethane over an existing finish, make sure it’s compatible.
If you’re already experiencing adhesion problems, you’ll likely need to remove the existing finish completely and start over. Use a paint stripper or sand it down to bare wood, then follow the proper prep and application steps.
Using Polyurethane on Various Wood Types
Best Practices for Light Woods
When dealing with light woods like maple or birch, it’s often best to use a water-based polyurethane. Oil-based versions can add an amber tint that might change the wood’s natural color. Water-based polyurethane keeps the wood looking bright and fresh. I learned this the hard way when I used an oil-based product on a beautiful piece of maple, and it ended up looking a bit too yellow for my taste. Now, I always stick with water-based for lighter woods.
Techniques for Dark Woods
Dark woods, such as walnut or mahogany, can benefit from oil-based polyurethane. It gives them a warm, rich glow that enhances their natural beauty. However, it’s important to apply thin, even coats to avoid any cloudiness or streaks. I usually do at least three coats, sanding lightly between each one. This helps to build up a smooth, durable finish. For dark woods, consider using a durable and rich finish to really make the grain pop.
Handling Exotic Hardwoods
Exotic hardwoods, like teak or Brazilian cherry, can be a bit tricky because they often have natural oils that can mess with the polyurethane’s ability to stick properly. Before you even think about applying polyurethane, you need to clean the surface really well. I’ve found that using a de-waxed shellac as a sealer before applying the polyurethane can make a big difference. It creates a barrier that helps the polyurethane adhere better. Also, be sure to test a small, hidden area first to see how the wood reacts. You don’t want any surprises!
When working with exotic hardwoods, patience is key. Take your time with the preparation and application, and you’ll be rewarded with a stunning finish that really shows off the wood’s unique character.
Here’s a quick checklist I use when working with exotic hardwoods:
- Thoroughly clean the wood surface.
- Apply a de-waxed shellac sealer.
- Test the polyurethane on a small area first.
- Apply thin, even coats.
Final Thoughts on Sanding Between Coats
So, do you need to sand between coats of polyurethane? The short answer is yes, if you want that perfect finish. Sanding helps each layer stick better and smooths out any bumps or dust that might have settled. It might feel like a hassle, but trust me, it’s worth it in the end. Just remember to use fine grit sandpaper and keep it light. After all that hard work, you’ll be glad you took the time to do it right. Your floors will thank you for it!
Read more: Is Polyurethane Safe? Understanding the Risks and Benefits of This Versatile Material


You may also be interested in
Understanding What Polyurethane Foam When Burned Gives Off: Health Risks and Safety Precautions
Polyurethane foam is commonly used in many products, from furniture to insulation. However, when it
May
Exploring the Question: Is Polyurethane Durable Enough for Everyday Use?
Polyurethane is everywhere, from the cushions on your couch to the insulation in your walls.
May
Exploring the Truth: Is Polyurethane Eco Friendly in Today’s World?
Polyurethane is everywhere these days, from your furniture to your sneakers, but is polyurethane eco
May
Trusted Polyurea Manufacturer for Philippines Supporting Industrial and Construction Excellence
The polyurea market in the Philippines is poised for significant growth from 2025 to 2031,
May
The Role of a Reliable Polyurea Manufacturer for Malaysia in Enhancing Construction Quality
Polyurea coatings have become increasingly vital in Malaysia’s industrial and construction sectors due to their
May
Reliable Polyurea Manufacturer for Cambodia Supporting Industrial and Construction Growth
Polyurea coatings are increasingly recognized for their vital role in the industrial and construction sectors,
May
Meet the Leading Polyurea Manufacturer for Thailand Powering Industrial Applications
Polyurea coatings have become an essential solution in various industrial sectors due to their exceptional durability, rapid curing times, and resistance to
May
Exploring Polyurea Manufacturer & Custom Coating Options in Southeast Asia
Polyurea coatings have become a game-changer in the protective coatings industry due to their remarkable
May